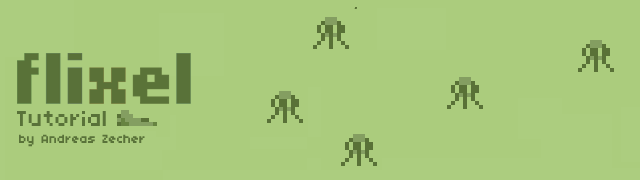
In this tutorial, I’ll explain how to develop a very simple Defender-style game using the open-source Flixel 2 game library for Flash. Flixel was written by Adam Saltsman and extracted from a couple of his own Flash games, including Gravity Hook, Fathom and Canabalt. There is also an iPhone version lurking around the corner, which will make Flixel even more useful.
Flixel is an AS3-only framework which means that we don’t need Adobe Flash CS4 at all. No movieclips, no timeline, no library and no high price tag. Instead, we will do everything with pure code and bitmap spritesheets.
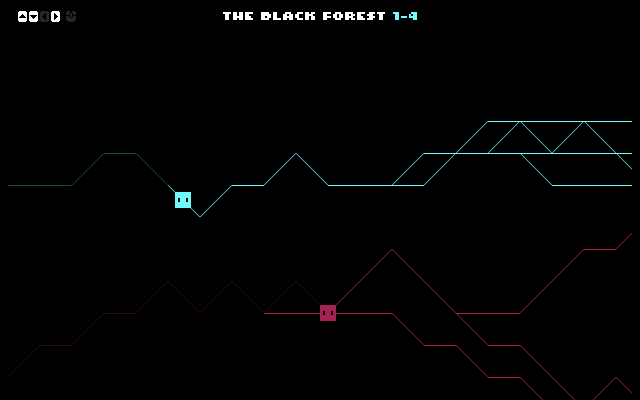
Game demo:
Setting up the project
Before we start, you need to setup your working environment so you can compile AS3-only projects into SWF files using the free Flex SDK. For this tutorial I have used Flex SDK 4.0. If you work on a Mac I recommend using TextMate for editing the source code. Have a look at this tutorial for how to set it up for AS3 projects. If you work on Windows FlashDevelop is a popular choice and completely free. The Flixel wiki has a good tutorial on how to setup FlashDevelop for Flixel.
Next, download version 2.32 of the Flixel library from GitHub. Since new versions of Flixel are frequently released version 2.32 might not be latest one, but we can be sure the tutorial will work with this version of Flixel.
Now let’s set up the basic project directory structure. Create a project folder that contains the TextMate or FlashDevelop project file, a folder for all graphic and sound assets, a folder for all source files with the Main.as file at the root and a bin folder for the compiled SWF. Move the org folder from the Flixel library into the src folder. Create the subfolders de/pixelate/flixelprimer for the actual source files of the game.
 You can find the complete source code for this tutorial on GitHub including the graphic and sound assets we will use for the tutorial.
Main.as will be the entry point for our game. Whenever it runs, it will execute the code in this class first. Make sure that you point the compiler to the Main.as file. (See links to the tutorials above on how to do this in TextMate or FlashDevelop.) When using Flixel we make the Main class a subclass of FlxGame, which is the heart of every Flixel game. The Main class imports the ActionScript files we need, sets up the screen size to 640×480 and starts the game with the PlayState.
package {
import org.flixel.*;
import de.pixelate.flixelprimer.*;

[SWF(width="640", height="480", backgroundColor="#ABCC7D")]
[Frame(factoryClass="Preloader")]

public class Main extends FlxGame
{
public function Main():void
{
super(640, 480, PlayState, 1);
}
}
}
The main class also points to the Preloader class, which will show a nice 8-bit style preloader bar when loading the game in the browser. The class looks like this:
package
{
import org.flixel.FlxPreloader;

public class Preloader extends FlxPreloader
{
public function Preloader():void
{
className = "Main";
super();
}
}
}
A Flixel game usually consists of different states which subclass FlxState. A common usage would be to have a state for the menu screen, one for the actual game and one for the highscore screen. In our case we will only use one state to keep things simple. Let’s add the scaffold for the play state. The create function will be called once PlayState is created by the main class. The update function is the main loop of the game which will be called every frame.
package de.pixelate.flixelprimer
{
import org.flixel.*;

public class PlayState extends FlxState
{
override public function create():void
{
super.create();
}

override public function update():void
{
super.update();
}
}
}
Adding the player sprite and controls
![]() Now that we have a good scaffold for the game, let’s add a space ship for the player. Create a new class in
Now that we have a good scaffold for the game, let’s add a space ship for the player. Create a new class in src/de/pixelate/flixelprimer called Ship.as:
package de.pixelate.flixelprimer
{
import org.flixel.*;

public class Ship extends FlxSprite
{
[Embed(source="../../../../assets/png/Ship.png")]
private var ImgShip:Class;

public function Ship():void
{
super(50, 50, ImgShip);
}

override public function update():void
{
velocity.x = 0;
velocity.y = 0;

if(FlxG.keys.LEFT)
{
velocity.x = -250;
}
else if(FlxG.keys.RIGHT)
{
velocity.x = 250;
}

if(FlxG.keys.UP)
{
velocity.y = -250;
}
else if(FlxG.keys.DOWN)
{
velocity.y = 250;
}

super.update();
}
}
}
FlxSprite is the main game object class in Flixel and handles basic physics and animation. The Ship class extends FlxSprite, draws the sprite at position x 50 and y 50 and sets the bitmap graphic for the ship which resides in the assets folder. The player controls are handled in the update function which is called by Flixel every frame. First the velocity is set back to zero. Then we check if the player is pressing the arrow keys and change the velocity accordingly. The super.update() call takes care of changing the position of the ship based on the current velocity.
Now we have to add the ship to the game stage. Add the following code to the create function in PlayState.as and declare _ship as a private variable above the function. We also set the background color of the game state to a nice monochrome green.
private var _ship: Ship;

override public function create():void
{
bgColor = 0xFFABCC7D;

_ship = new Ship();
add(_ship);

super.create();
}
Now compile the project and start the SWF in the Flash Player. Move the ship around with the arrow keys. The player input works well but the ship can move outside the screen. Let’s fix that. Add the following code into the update function in Ship.as where we make sure that the position of the ship is always within the screen dimensions. We also add a padding of 16 pixels to the if-condition to make it look nicer. Make sure to insert the code after the super.update() call.
if(x > FlxG.width-width-16)
{
x = FlxG.width-width-16;
}
else if(x < 16)
{
x = 16;
}

if(y > FlxG.height-height-16)
{
y = FlxG.height-height-16;
}
else if(y < 16)
{
y = 16;
}
Adding enemies
![]() Next, let’s add some enemies. Create the file
Next, let’s add some enemies. Create the file Alien.as inside src/de/pixelate/flixelprimer. The Alien class takes x and y as arguments in the constructor so we can easily position the sprite when creating it. We set the horizontal velocity to -200 which makes the alien move from right to left at a constant speed. In the update function we use a cosine function to move the alien up and down in a wave motion.
package de.pixelate.flixelprimer
{
import org.flixel.*;

public class Alien extends FlxSprite
{
[Embed(source="../../../../assets/png/Alien.png")]
private var ImgAlien:Class;

public function Alien(x: Number, y: Number):void
{
super(x, y, ImgAlien);
velocity.x = -200;
}

override public function update():void
{
velocity.y = Math.cos(x / 50) * 50;
super.update();
}
}
}
To spawn the aliens, we need to add some more code to the PlayState. First we add a FlxGroup for the alien sprites, a logical container which helps us to organize the collision detection between the player ship and aliens. Second we add a spawn timer which controls the interval when a new alien is spawned. The interval starts at 2.5 seconds and slowly becomes faster until it reaches it’s maximum of spawning a new alien every tenth second. Finally we add a function for spawning an alien at a random position at the right border of the screen.
package de.pixelate.flixelprimer
{
import org.flixel.*;

public class PlayState extends FlxState
{
private var _ship: Ship;
private var _aliens: FlxGroup;
private var _spawnTimer: Number;
private var _spawnInterval: Number = 2.5;

override public function create():void
{
bgColor = 0x0ABCC7D;

_ship = new Ship();
add(_ship);

_aliens = new FlxGroup();
add(_aliens);

resetSpawnTimer();

super.create();
}

override public function update():void
{
_spawnTimer -= FlxG.elapsed;

if(_spawnTimer < 0)
{
spawnAlien();
resetSpawnTimer();
}

super.update();
}

private function spawnAlien():void
{
var x: Number = FlxG.width;
var y: Number = Math.random() * (FlxG.height - 100) + 50;
_aliens.add(new Alien(x, y));
}

private function resetSpawnTimer():void
{
_spawnTimer = _spawnInterval;
_spawnInterval *= 0.95;
if(_spawnInterval < 0.1)
{
_spawnInterval = 0.1;
}
}
}
}
Adding bullets
![]() Now let’s add bullets so the player can shoot to fight the aliens. Create a new class in
Now let’s add bullets so the player can shoot to fight the aliens. Create a new class in src/de/pixelate/flixelprimer called Bullet.as. Nothing fancy here, except that we don’t use a bitmap graphic, but draw the bullet directly in the createGraphic() call.
package de.pixelate.flixelprimer
{
import org.flixel.*;

public class Bullet extends FlxSprite
{
public function Bullet(x: Number, y: Number):void
{
super(x, y);
createGraphic(16, 4, 0xFF597137);
velocity.x = 1000;
}
}
}
As with the aliens we add a FlxGroup for the bullets and a spawn function as well. In the update function we check if the player just pressed the space key and fire a bullet if that is the case.
package de.pixelate.flixelprimer
{
import org.flixel.*;

public class PlayState extends FlxState
{
private var _ship: Ship;
private var _aliens: FlxGroup;
private var _bullets: FlxGroup;
private var _spawnTimer: Number;
private var _spawnInterval: Number = 2.5;

override public function create():void
{
bgColor = 0x0ABCC7D;

_ship = new Ship();
add(_ship);

_aliens = new FlxGroup();
add(_aliens);

_bullets = new FlxGroup();
add(_bullets);

resetSpawnTimer();

super.create();
}

override public function update():void
{
if(FlxG.keys.justPressed("SPACE") && _ship.dead == false)
{
spawnBullet(_ship.getBulletSpawnPosition());
}

_spawnTimer -= FlxG.elapsed;

if(_spawnTimer < 0)
{
spawnAlien();
resetSpawnTimer();
}

super.update();
}

private function spawnBullet(p: FlxPoint):void
{
var bullet: Bullet = new Bullet(p.x, p.y);
_bullets.add(bullet);
}

// ...
}
}
Note that we also added a new function to Ship.as to get the correct spawn position for the bullet from the player’s ship:
public function getBulletSpawnPosition():FlxPoint
{
var p: FlxPoint = new FlxPoint(x + 36, y + 12);
return p;
}
Adding collision detection
![]() The only thing missing to make our game playable is collision detection. We handle the collision in the beginning of the
The only thing missing to make our game playable is collision detection. We handle the collision in the beginning of the update function of PlayState. The first call checks if any sprite in the aliens group overlaps with any bullet sprite and calls the overlapAlienBullet callback if so. The second call checks for collisions between the aliens and the ship sprite.
[sourcecode language=”as3″]FlxU.overlap(_aliens, _bullets, overlapAlienBullet);
FlxU.overlap(_aliens, _ship, overlapAlienShip);[/sourcecode]
In the callback functions we define what happens in case of a collision. When an alien sprite gets hit by a bullet, we destroy both the alien and the bullet sprite, increase the score counter and display the updated score on the screen. When the ship gets hit by an alien we also let the screen rumble a bit using the quake function and display a game over message.
private function overlapAlienBullet(alien: Alien, bullet: Bullet):void
{
alien.kill();
bullet.kill();
FlxG.score += 1;
_scoreText.text = FlxG.score.toString();
}

private function overlapAlienShip(alien: Alien, ship: Ship):void
{
ship.kill();
alien.kill();
FlxG.quake.start(0.02);

_gameOverText = new FlxText(0, FlxG.height / 2, FlxG.width,
"GAME OVER\nPRESS ENTER TO PLAY AGAIN");
_gameOverText.setFormat(null, 16, 0xFF597137, "center");
add(_gameOverText);
}
We also need to initialize the text fields. Add a private variable declaration for the text fields in PlayState:
private var _scoreText: FlxText;
private var _gameOverText: FlxText;
To allow the player to restart the game on game over we add the following code to the update function in the PlayState:
if(FlxG.keys.ENTER && _ship.dead)
{
FlxG.state = new PlayState();
}
Create the score text field in the create function in PlayState and set the FlxG.score variable to zero.
FlxG.score = 0;
_scoreText = new FlxText(10, 8, 200, "0");
_scoreText.setFormat(null, 32, 0xFF597137, "left");
add(_scoreText);
Adding sounds
The game is fully playable now. Let’s add some sounds to give the player a better feedback of the action. Define all references to the sound files in the header of PlayState.
public class PlayState extends FlxState
{
[Embed(source="../../../../assets/mp3/ExplosionShip.mp3")]
private var SoundExplosionShip:Class;
[Embed(source="../../../../assets/mp3/ExplosionAlien.mp3")]
private var SoundExplosionAlien:Class;
[Embed(source="../../../../assets/mp3/Bullet.mp3")]
private var SoundBullet:Class;

// ...
}
We call the FlxG.play function to play the sounds in the according situations.
// In spawnBullet()
FlxG.play(SoundBullet);

// In overlapAlienBullet()
FlxG.play(SoundExplosionAlien);

// In overlapAlienShip()
FlxG.play(SoundExplosionShip);
Adding explosions
 Finally we add some particle explosions when the ship or an alien is destroyed using the
 FlxEmitter class. We want to use the same explosion for the ship and the aliens so we move the explosion code into a reusable function.
private function createEmitter():FlxEmitter
{
var emitter:FlxEmitter = new FlxEmitter();
emitter.delay = 1;
emitter.gravity = 0;
emitter.maxRotation = 0;
emitter.setXSpeed(-500, 500);
emitter.setYSpeed(-500, 500);
var particles: int = 10;
for(var i: int = 0; i < particles; i++)
{
var particle:FlxSprite = new FlxSprite();
particle.createGraphic(2, 2, 0xFF597137);
particle.exists = false;
emitter.add(particle);
}
emitter.start();
add(emitter);
return emitter;
}
In the collision callback functions we create the emitter for the explosion and place it at the position of the ship or alien using emitter.at().
// In overlapAlienBullet()
var emitter:FlxEmitter = createEmitter();
emitter.at(alien);

// In overlapAlienShip()
var emitter:FlxEmitter = createEmitter();
emitter.at(ship);
Now you have a simple game in Flixel that should help you getting started building your own ideas. If you have any questions, leave a comment or have a look at the Flixel forums and the wiki.